Connect

Wednesday, August 31, 2011

My Back-To-School Makeup Must-Haves


□ Maybelline Dream Matte powder. I get oily skin throughout the day and I need it for touch ups when I'm out and about. I love using this with either my MAC 129 (sh) or my Sigma F45 Buffer brush.

□ Covergirl Lashblast in waterproof. This has been my go-to mascara for quite some time now and it's been a favorite for a while. And since it's still hot where I live I can't afford to have my makeup run, especially not my mascara.

□ Wet N Wild Just Peachy lipstick. It's a nice subtle peachy pink color that's great for back to school. It's been a favorite of mine for this month.

□ Wet N Wild cream liner. I've been using this for the whole summer and I love it. It's super inexpensive and it lasts all day which is great for someone who's in school day and night. 

 NYX Pinched blush. I think this is a perfect shade for back to school. It's a coral-pink shade with gold shimmer and it's soooo pretty! I think it gives off that youthful glow. An alternative to that is NARS Orgasm but that's more expensive :P

□ Sonia Kashuk Radiant Tinted Moisturizer. This is great if you want a light-medium coverage without the heavy feeling of foundation. I love this tinted moisturizer! Set it with powder and you're good to go. Lasts all day!
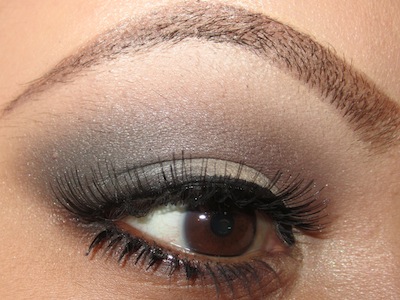
 And last but not least would definitely have to be all 4 of the Wet N Wild color icon eyeshadow palettes (6 pan)If you're looking for good quality drugstore shadows that won't break the bank, these will definitely satisfy your needs. I hear a lot of people saying that these palettes will be discontinued soon so if you happen to see it on the shelves at your drugstore, I highly suggest you buy them!

All of these products are perfect for students especially for those who are on a budget since these are all drugstore items. I use all of these products on a regular basis and I highly recommend them to those who are not just going back to school but to use as part of their daily routine.

Saturday, August 27, 2011

Revlon Precision Lash Adhesive Review


I'm so excited to review this product because I love it so much! I'm such a crazy falsies person and I swear by this product that applying my lashes have never been so much easier until now! I'm telling you guys, this is probably by far the best lash adhesive I've tried, and I've tried it all! I've been use false eyelashes for so many years now and even though I've gotten used to applying them, using this adhesive has made it 10x easier! I kid you not, this stuff is amazing. I've been an avid user of DUO adhesive and LashGrip adhesive and yes, it gets the job done. But there's something so different about the Revlon adhesive that makes it stand out from the rest and I highly recommend it for everyone from lash beginners to experts! I can't stress it enough how easy this makes applying false eyelashes. I practically call this stuff mistake-proof!

PROS:
□ It's in a bottle form with a brush applicator. No more spilling or wasting too much adhesive!
□ No wait time for the product to get tacky. The formula is already sticky so you can apply your lashes right away.
□ It's inexpensive and can be found at most drugstores (around $4.99USD)
□ No need to reapply any eyeliner on top of the glue because it's not visible.
□ The formula is a lot thinner than regular lash glue so a little bit goes a long way which is great because your lashes look much more cleaner without the any visible sign of glue showing.
□ The glue is already clear but it has a slight bluish tint to it, I don't know why. But once it's on your eyes, it's invisible.
□ Lashes stay on all day with no peeling on the inner or outer corners (one of my biggest pet peeves).
□ Latex-free for those who are allergic.
□ Definitely mess-free application.
□ Easy to remove.
□ Brush applicator allows for easy touchup when needed.
□ Waterproof.

CONS:
□ None!


This picture was taken right after I applied the lashes. I have no makeup on and no eyeliner on.
You can see there is no visible sign of glue showing. :)


DISCLAIMER: The products reviewed on this blog are based on the opinions and experiences of the author. This product was purchased by the author and in no way was this review influenced by the company of the product.

Friday, August 26, 2011

AK Brand False Eyelashes From KKCenterHk

True story: false eyelashes are my best friend! Haha :) Anyway, I'm starting to get used to the look of wearing top and bottom lashes together. I still don't pull off this look nearly enough as I'd like to but I really love the look of full lashes.

AK Brand lashes are from Taiwan and are 100% handmade. Each box comes with 5 pairs of lashes. They have a variety of both top and bottom lashes ranging in different styles. You can purchase these lashes at KkCenterHk for $12.50(USD) a box.


Style: #601

Style: #601

These lashes are very similar to other ones I've tried (but I forgot which brand they were). These lashes are wispie and very comfortable! I really love lashes that have invisible bands like this because I feel like it stays put on my eyes longer than other lashes with thicker bands. It also feels more natural because they're not heavy on the eyes. They flare out nicely wear the inner corner is shorter compared to the outer corner. To me these are more of my idea of "natural" lashes so I would definitely wear these on a regular basis. They're not too short or too long so it's just right if you're looking for something simple yet elegant.

Style: #682B (bottom lashes)

Style: #682B (bottom lashes)

These bottom lashes are short and thick and comfortable to wear. Again, I prefer lashes with invisible bands because it feels lighter and feels like you're not wearing anything. Other bottom lashes made my eyes feel stiff but these bottom lashes are definitely the most comfortable. As always, I cut the bottom lashes in half because I like the look of thicker lashes more towards the outer half but you could very much use the entire band if you wanted to. 


DISCLAIMER: In no way is this blog accepting any form of payment for products received by companies. The products reviewed on this blog are based on the opinions and experiences of the author. The products in this review were provided by the company.

Wednesday, August 24, 2011

False Eyelashes Collection!


I recently decided to transfer my makeup around because a lot of it was out in the open. I decided to move my most frequently used items closer to my vanity rather than in a separate drawer. Then I ended up putting my lash collection into the empty drawers because they were so unorganized on top of my vanity. It wasn't a pretty sight to see especially since I have so much of them and the boxes would even topple on top of each other. It just looked really cluttered and I didn't like seeing it. Once I was done putting them into the drawer I realized that I've accumulated so many falsies over a period of time. The drawer is already almost filled and it is the biggest drawer I have! If that doesn't scream false eyelashes addict, I don't know what does. What can I say? I love falsies! :D

Picture Tutorial: DIY Feather Extensions


Before anyone makes a comment about it, I want to first mention that these feather extensions are not made of real feathers. They are synthetic faux feather extensions made to look like real feathers. :)

Feather extensions are pretty trendy this season. I'm not sure how everyone else feels about them but I personally think it looks cute if it's not overdone. Getting feather extensions, or any extensions I presume, can get pretty expensive if you get it done professionally. And since I'm more budget friendly when it comes to doing pretty much everything, I thought it would be fun to try DIY feather extensions myself. Applying the feather extensions was pretty easy. I practiced a little bit without the hair extensions which helped me a lot when I actually applied the extensions. I did it in one try!

You can purchase everything in this tutorial at bornprettystore.com (not including the pliers I used). They provide different color hair extensions to choose from. The colors range from pink, red, blue, green, etc. But since I already have red hair I wasn't sure how well the feather extensions would stand out so I picked a color closes to what I wanted, which was white, and got the sky blue color instead.

Note: This is just a tutorial on how to apply feather extensions. If you don't like it please keep your comments to yourself. :)

What You Will Need:
 Hair extension pulling needle (link)
 Micro beads (link)
 Pliers
 Extensions (link)

STEP 1: Open the latch door on your pulling needle

STEP 2: Insert the hair extension micro bead

STEP 3: Pick out a few strands of hair using the hook of the pulling needle and close the latch door.
STEP 4: Slide the micro bead upwards and pull the needle downwards to pull your hair through the bead.

STEP 5: Bring the micro bead close to your roots.
STEP 6: Insert your feather extension through the hole.

STEP 7: Take your pliers and clamp the micro bead till it is secure.
Make sure the micro bead is squeezed tightly to ensure it won't fall off.

FINISHED!


Feather extensions can last you a good while (a few weeks to a few months) if you take care of them properly. They can withstand being washed but just be careful not to tug on them. I have not yet tried straightening or curling the extensions. I've heard a number of people say that you can but many others have said that you can't apply heat to them and I don't want to take the risk of ruining them so I choose to leave it how it is. Anyway, I hope you all find this tutorial helpful if you decide to do feather extensions on yourself or for others. :)

Have any of you tried feather extensions?
How do you like them?


DISCLAIMER: In no way is this blog accepting any form of payment for products received by companies. The products reviewed on this blog are based on the opinions and experiences of the author. The products in this review were provided by the company.

(CLOSED) Hana 30 Day Lenses Review & Giveaway (PinkyParadise)


Caution Notes:You are best advised to consult your eye doctor before wearing any contact lens. It is your responsibilities to minimize the risk of wearing lenses. Kindly please read the wear and care guide carefully to ensure proper handling of lenses (which is provided in the website). The rule of thumb for your eye safety is, if you experience any discomfort, please remove the lens immediately.

I've been trying out these circle lenses from Pinkyparadise.com. I really like the big dolly eye effect of them and because they're brown, they look really natural. I have both the Mars Brown and Iceye Brown lenses and they look pretty much identical when I wear them. Iceye Brown is a tiny bit lighter than Mars Brown but there really isn't much difference between the two.

The Hana 30 Days lenses last for one month and they range $11.90 each.

PRODUCT DESCRIPTION:
Diameter : 14.0mm
Water Content : 45%
Base Curve : 8.6mm
Life Span : 1 month disposal


PROS:
For circle lenses, the Hana Iceye and Mars Brown look really natural. Some circle lenses can look somewhat scary but these lenses really bring out your eyes without looking too fake. They do make your eyes look bigger which I like and because it isn't too obvious that I have circle lenses on. Iceye Brown is far more comfortable than Mars Brown. The Iceye Brown lenses didn't feel drying on my eyes and it felt comfortable enough for me to wear for a long period of time. Both lenses are comfortable at first but Iceye Brown lasted longer based on comfort level.

CONS:
Mars Brown on the other hand was more uncomfortable on my eyes. It was a bit drying even after just putting them on. Personally I don't think it's the lenses fault because with any lenses I wear I always seem to find some level of discomfort after putting them on. So this "con" isn't really put to blame on the lenses, more so on myself.

PINKYPARADISE COUPON CODE: "tinamarieonline"
1. Customers entitle a FREE cute animal lens case PLUS mystery gifts
2. The coupon code can be stacked, If you purchase 3 pairs, you will get 3 lens case plus 3 mystery gifts.
3. A minimum of 1 lens purchased to activate the code.
4. The code has no expired dates :)


Hana 30 Days Mars Brown


Hana 30 Days Iceye Brown


GIVEAWAY
Now that I reviewed these lenses I thought I should participate in hosting a giveaway for my readers, courtesy of Pinkyparadise. The rules are easy! All you have to do is 'Like' Pinky Paradise on Facebook (www.facebook.com/pinkyparadise).

One winner will ONLY be able to choose their prescription and color desired. Pinky Paradise will randomly choose a pair of lenses from their stock.

Once you have 'Liked' them on Facebook, leave a comment on this blog post with whatever color lenses you would like to win. That's all there is to it!


Giveaway ends September 2, 2011 (11:59 PDT)
Open Internationally


DISCLAIMER: In no way is this blog accepting any form of payment for products received by companies. The products reviewed on this blog are based on the opinions and experiences of the author. The products in this review were provided by the company.

Monday, August 22, 2011

Video Tutorial: Back To School/Work Look

Even though I'm not technically going back to school I thought this look would be good for those who are. Especially if you're a teenager and you're looking for an everyday look that's simple and clean. This can also be your basic everyday look if you're not going to school or a look for going to work. This look is very easy to do and you can substitute a lot of colors that I used. You can also darken it up a little bit to make it a little more smokey by applying a darker brown or black eyeshadow to the outer corner. It's totally up to you! Have fun with this look if you decide to try it out. Enjoy! :)


EYES:
UDPP in Eden
MAC Painterly Paint Pot
MAC Sketch eyeshadow
MAC Blanc Type eyeshadow
MAC Embark eyeshadow
MAC Nylon eyeshadow
MAC Brule eyeshadow
MAC Carbon eyeshadow
MAC Blacktrack fluidline
Milani Liquif Eye eyeliner
False eyelashes from Eye's Chic Style 461

CHEEKS:
MAC Ambering Rose blush

LIPS:
MAC Viva Glam VI lipglass

Saturday, August 20, 2011

Sigma Beauty's Buffer F45 Brush - Review, Photos & Giveaway (CLOSED)

As some of you may know I'm a huge fan of Sigma brushes. I've been using their brushes for quite some time now and they are definitely a staple in my makeup routine. Some may say they are similar to MAC brushes but I think Sigma deserves credit all on its own for making great quality brushes and shouldn't really be compared to other brands. Sure there are similarities of other brushes that look the same but in my opinion Sigma truly stands out on its own. With that said I'm super excited to host yet another giveaway for my Facebook and Twitter fans out there for a chance to win Sigma's Buffer Brush!


When I think of buffer (or kabuki) brushes I think of mineral foundation. I think it's because I'm so used to seeing the Bare Escentuals infomercial with their "swirl, tap, and buff" slogan. However, Sigma's buffer brush is great for many uses other than for applying mineral foundation. I've used this brush for setting my foundation with loose setting powder and for touching up my face with pressed powder. This brush is definitely great for an all-over-the-face powder brush and it's great for taking with you on the go for doing touch ups. The brush itself is fairly large and fluffy with natural bristles so I see it more as a powder brush over anything else though I don't see why you can't use it for blush or bronzer!
To purchase this brush click here ($19.00 USD).

PROS:
Great for loose and pressed powders
Buffs evenly
Makes foundation and powder look natural
Bristles are soft and doesn't feel scratchy
Great size for face powders with just the right amount of density
Travel-friendly
Inexpensive
Dries fast after washing

CONS:
Bristles shed during wash and applying powder but decreased after a few uses


FACEBOOK and TWITTER GIVEAWAY
One person will be chosen at random to receive a free Sigma Buffer F45 brush.

How to enter:
Must 'Like' TinaMarieOnline on Facebook
Must be a follower on Twitter (username: ktinass)
Leave a comment on designated Facebook status with the words 'Enter Me' and your Twitter username

*Open internationally
*One entry per person
*Comments on this blog post will not qualify
*Giveaway ends August 27, 2011 (11:59 PDT)


DISCLAIMER: In no way is this blog accepting any form of payment for products received by companies. The products reviewed on this blog are based on the opinions and experiences of the author. The products in this review were provided by the company.

Friday, August 19, 2011

Series 4: Wet N Wild Pride Palette Look & Tutorial

I decided to do a series of looks using each of the Wet n Wild Color Icon Eyeshadow Palettes (6 Pan). These shadows are really inexpensive and made with really great quality. Each color has amazing pigmentation with smooth and rich, but never powdery texture. With a mixture of both matte and shimmer eyeshadows, there are endless possibilities to create different looks just by mixing and matching different colors from each palette. Within the next upcoming posts I'll be focusing on creating a look using each palette and working with some (or all) of the 6 colors.

Pride is a palette with cool navy blues and soft teal greens. I LOVE this palette! The blues and greens blend effortlessly together. Though I don't prefer to do many blue looks on a daily basis, I do like this palette for more dramatic looks. I would mostly use certain colors in this palette to do other looks with other shadows because each color is great individually.


Lips:
NYX Marrakesh Pink lipstick
Wet N Wild This Too Shall Glass gloss

Cheeks:
NYX Mauve

Lashes:
Style #890 from bornprettystore.com