Connect

Wednesday, June 30, 2010

EOTD - Make Up For Ever 92 - Purple Paradise

I thought the previous look I did was pretty awful so I wanted to make up for it and do something more dramatic. After looking at my previous look, I knew I had to up my game because I knew in my mind that I could have done a better job. I guess it's true what people say, you are your worst critic! So I hope this look suffices. Hope you all like it!


EYES:
Urban Decay Primer Potion in "Eden"
MAC Pharaoh paint pot (LE) applied to entire lid
MAC Bitter eyeshadow applied to entire lid & lightly brushed above the crease
MUFE 92 applied to crease and lower lash line
MAC Passionate eyeshadow lightly brushed between Bitter & 92
MAC Nylon eyeshadow applied as highlight
Revlon Colorstay liquid eyeliner applied to upper lash line
MAC Smolder eye kohl applied to lower waterline
CoverGirl LashBlast waterproof mascara
Darkness lashes

CHEEKS:
Marine Life Highlight Powder

LIPS:
MAC Her Fancy lipstick

Tuesday, June 29, 2010

Coral and Purple EOTD


Sorry guys, I'll get to what I used in this look in just a moment. I did this look a few days ago and I can't remember what I used! Overall, not my best look but I couldn't let it go to waste. (:

Thursday, June 24, 2010

My Hair Is Red!

Taken indoors. I have yet to see how it looks out in sunlight!

main components:
 1) Developer helps oxidize and open your hair shaft to help the color stick permanently.
I chose number 30 for extra lift.

2) L'Oreal Excellence HiColor HiLights in Red.
Two boxes is required for my hair length and thickness.

You will also need:
3) Gloves
4) Plastic bottle applicator or a plastic bowl
5) Tint brush

I mixed about 1.5 oz of developer per box of hair dye. I started from the bottom portion of my hair, working my way up, doing the top of my head last. I left the dye on for about 30 minutes which is probably more than enough.

This is my first time dying it red and actually having it come out red! I attempted this before but I had forgotten that I previously dyed my hair black which obviously wasn't going to absorb any of the red hair dye. So when I dyed it, it came out really dark red and then faded to brown. Since my hair turned brown I thought it was a good time for me to dye it red again and this time it was a success!

Monday, June 21, 2010

EOTD: Bang On Blue

I decided to play with makeup today. I did it really simple with some blues. Nothing crazy! I was wondering if you guys think my looks are looking repetitive lately. Maybe I just keep using a lot of the same colors. I don't know but hope you all like this one. I was gonna go for a summer look with warm colors but for some reason I keep reaching out for my blues. Oh well!

Oh yeah and in case anyone might ask, I got my shirt in Hawaii. If you're filipino, I'm sure you get it. :P (PS: Don't take it seriously)


EYES:
Urban Decay Primer Potion
MAC Electro Sky paint pot all over lid
MAC Bang On Blue (LE) applied all over lid
MAC Climate Blue applied to outer corners
MAC Fade eyeshadow applied to inner corners and blended upwards
MAC Shimmermoss eyeshadow applied above crease and lower lash line
MAC Brule eyeshadow applied as highlight
MAC Royal Wink fluidline applied to lower lash line
Revlon Colorstay liquid eyeliner applied to upper lash line
CoverGirl LashBlast waterproof mascara

Saturday, June 5, 2010

Revlon Super Lustrous Lipgloss - Photos, Swatches and Review


These lipglosses are also a big hit in the beauty buzz. I hear a lot of ladies talking about it and I thought I'd give these a try. I can honestly say that I really like these lipglosses.

At first glance I knew I wouldn't have stopped and looked at these lipglosses if nobody had mentioned how good they were. I'm honestly glad I did! These three shades were the only ones available so I can't really compare them to the other shades. I checked online at the different colors and I'm glad I ended up with these choices.

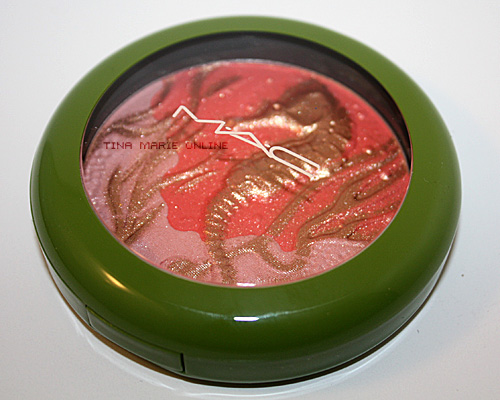
AVAILABLE AT: Most drugstores. I bought mine at CVS
PRICE: $8 USD (BOGO 50% sale at CVS and Walgreens right now)
SIZE: 0.2 FL. Oz/5.9 mL
VALUE FOR PRICE: 5/5
EASE OF USE: 5/5
PACKAGING: 5/5
MEETS EXPECTATIONS: 5/5
OVERALL USE: 5/5

PROS:
Non-sticky
Feels moisturizing
No strong scent
Inexpensive
Does not dry my lips
Decent pigmentation (depends what color)
Decent lasting wear
→  Cream finish (Lilac Pastelle looks like it has a tiny bit of shimmer but it's not obvious)

CONS:
The taste. It tastes like I accidently sprayed body spray in my mouth. I'm a little over exaggerating because the taste is there but it's not a very strong taste. But I don't usually have that problem with other lipglosses. It could just be me.

OVERALL:
I'm very pleased with my purchase. I feel like I could carry all of them in my makeup bag and never feel like I'm missing a shade to wear during the day (maybe except a nude). I'm definitely gonna keep these in my makeup bag because I don't think I could ever go wrong with these shades no matter what look I'm wearing on my eyes. These colors are perfect for the summertime. Because they're not sticky, it won't feel like you're wearing heavy goop on your lips. I would say of the three shades, my favorite is definitely Coral Reef.

Coral Reef/Lilac Pastelle/Pink Pop

Coral Reef/Pink Pop/Lilac Pastelle

Lilac Pastelle

Pink Pop

Coral Reef

Lilac Pastelle

Pink Pop

Coral Reef


WOULD I RECOMMEND THIS PRODUCT? Yes
WOULD I PURCHASE AGAIN? Yes


DISCLAIMER: The products reviewed on this blog are based on the opinions and experiences of the author. This product was purchased by the author and in no way was this review influenced by the company of the product.

Thursday, May 27, 2010

MAC To The Beach Collection: Marine Life High-Light Powder Photos

I just got this today. I did purchase other items from the collection but this is obviously the biggest hype that's going on in the beauty buzz. I haven't swatched it yet. I'll probably swatch it tomorrow because I already have a full face of makeup on and I don't want my grubby hands all up in it and removing the golden shimmer sheen that's on top of the seahorse. (Not that my hands are grubby).

I went in to one MAC Counter inside a Macy's and they were completely sold out already. So I had drive all the way down to South SD to cop this. They already had it on hold for me but they didn't need to because they had a whole stock of these. So if you're in the SD area and you're out of luck, try Otay Ranch, inside Macy's. (:

Anyway, this is just for your viewing pleasure. I know, kind of lame. Sorry! Did you get anything from this collection?


Marine Life High-Light Powder ($26.00)

Monday, May 24, 2010

MATTE EYES: Smokey Yellow

Blending matte colors together isn't always a piece of cake. It takes a lot of time and patience to really blend them together. If you don't spend enough time and effort blending matte colors, it'll end up looking streaky. Any of you have this same problem?

You can easily slap on two colors and blend them together and be done but to me, the gradient between colors won't be as perfect. There will always be a harsh line if you don't spend time blending. I guess that's the perfectionist side of me!

As easy as it may look, it takes me longer to blend matte colors. With this look I was literally sitting there just blending the black into the yellow (or yellow into black) with different brushes in my hand (MAC 217, 224 and two MAC 239 brushes). You would think so because the two are colors are nearly opposite of each other. I did as best I could to blend them together. I think it turned out okay.

I also used a light hand on the black which is why it appears to be grey.


EYES:
Urban Decay Primer Potion
NYX Jumbo Eyeshadow Pencil in White applied all over lid up to brow bone
NYX White eyeshadow applied to brow bone and inner corners
MAC Chrome Yellow eyeshadow applied to the middle of the lid
MAC Carbon eyeshadow applied to outer corners and lower lash line
MAC Silver Fog pigment (LE) applied to inner lower lash line
Revlon Colorstay liquid eyeliner on upper lash line
Revlon Colorstay eyeliner on lower waterline

CHEEKS:
MAC Emote blush
MAC Ambering Rose blush

LIPS:
Rimmel lipstick in Vintage

LOOK: Sun Kissed Eyes

You've heard of sun kissed skin. Why not sun kissed eyes? I decided to bring out my all time favorite MAC Pigment, Off The Radar, and use it to give my eyes a really nice summertime look.

I also chose to lay off the eyeliner on my upper lash line because I really wanted this look to be bright and fresh. I really wanted the orange and green to pop so I just stuck with using mascara and black eyeliner on the lower waterline.

I really love this look for the summertime. Off The Radar pigment is so easy to pull off as a single wash of color even though I did blend some other colors into it. This color would look amazing on its own. I hope you all like this look. Not sure if I'm feeling the lip color though. I love it and hate it at the same time. What do you think? I did replace the lip color with a peachy pink lipglass but I couldn't get any good pictures out of it so these will have to do. Enjoy!


EYES:
Urban Decay Primer Potion
MAC Flammable paint (discontinued) applied all over lid, avoid going above the crease
MAC Off The Radar pigment (LE) applied all over lid and above crease (wet)
MAC Fab & Flashy eyeshadow (LE) applied above crease
MAC Golden Lemon pigment applied to inner corners and inner lower lash line
MAC Coppering eyeshadow applied to outer corners
MAC Brule eyeshadow applied as highlight
MAC Wondergrass eyeshadow (LE) applied to lower lash line
CoverGirl Lash Blast mascara
Revlon Colorstay eyeliner on lower waterline

CHEEKS:
NARS Laguna used to contour
MAC Gingerly blush on apples of cheeks

LIPS:
Revlon Nude Attitude lipstick
NYX Cafe Latte round lipglass